How To Create a Houseplant Planter
Creating your own houseplant planter is a fantastic way to add extra greenery to your home, with a personalised feel. By making your own planter from scratch, you have the freedom to customise it at every stage.
From choosing the plants to add, right down to the pot you plant them in, the options are endless. Throughout this step by step guide, we will walk you through each stage of planting your own houseplants to create your very own unique creation.

You will need
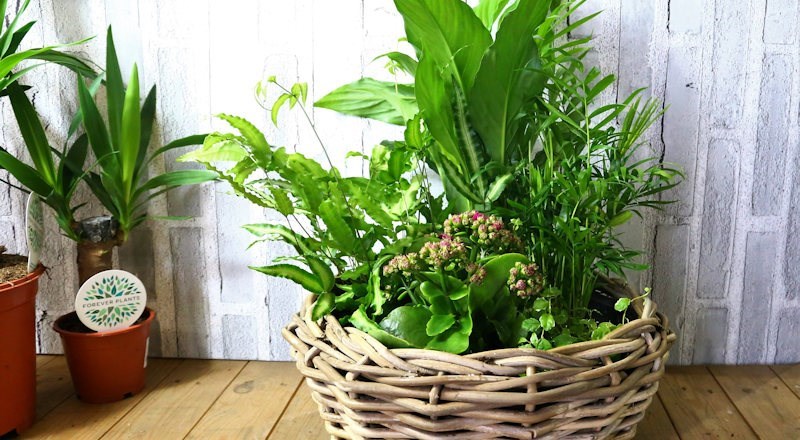
- Houseplant pot – we recommend the Van Der Leeden Bowl Planter, or similar
- Houseplant focus repotting mix - 8 litres or more depending on pot size
- Gro-sure perlite or similar, such as water saving gel
- Selection of houseplants – we suggest 3 to 5 depending on pot size, and ones with varying heights
- Watering can
Instructions

1. Take your chosen pot, and start by filling it half full with the houseplant repotting soil.
2. Next you will want to add 3 to 5 handfuls of perlite to your soil to help with the absorption of excess water in the soil.
3. Chose the plant you want to add first and carefully remove the pot. The easiest way to do this is by holding the plant at the base with a firm grip, and squeezing the pot gently to loosen the soil. Holding on to the plant, the pot should slide away from the roots and soil.

4. Before placing the plant into the soil, you will need to start loosening the roots and the soil to help with new root establishment. To do this, hold the base of the plant in one hand, and use the other to compress the roots until its begins to break up and loosen. If soil starts to fall away from the roots don’t worry, this does not harm the plant.
5. Decide where you would like the plant to sit in the pot, and carefully push the roots into the soil. You may find it easier to create a small well in the soil to place the plant into. Now press down on the top of the plants roots to secure them into the soil in the pot.

6. With your remaining plants, repeat steps 3 to 5 until you have all your chosen plants placed into the pot. When adding each extra plant, you may find you need to add extra soil in and around the roots to help secure them in place.

7. Once you are happy with the placement of your plants, and have filled any gaps with extra soil, begin to press all roots into the soil firmly. We find it is best to place both hands around the base of the plant and push in a downwards motion while holding the base steady. This ensures the roots remain attached to the plant, but are fully submerged in the soil. Where needed, add in extra handfuls of soil to the surface until the substrate is level and all roots are fully covered.
8. Take an additional handful of perlite and spread this in and around each plant, onto the surface of the soil. This will aid in drainage and absorb more moisture.
9. Once you have completed planting, the final step is to water the soil well and admire your hard work.