16 December 2014
The Big Green Egg ¦ More than just a barbecue...
What makes the Big Green Egg different to other barbecues?
- Once lit, the EGG is ready to start cooking in as little as 15 minutes (as opposed to conventional barbecues which can take up to 45 minutes!)
- You control the EGG. The inbuilt vents give you the power to reduce or increase the air-flow, thus changing the temperature inside the EGG. The vents allow air to flow through; when they are wide open the oxygen levels for the hot coals are at their highest. Partially closing the vents decreases air-flow and reduces the available oxygen, therefore the temperature lowers. You can keep an eye on the thermometer to decide how much you should open and close the vents.
- The ceramic technology of the EGG is the same as that developed by NASA for their heat shields. This means that the EGG is resistant to virtually all damage as a result of extreme high or extreme cold temperatures. It also means that it has improved insulation, thermal shock tolerance, durability and strength and will keep the outside surface much cooler than any gas grill.
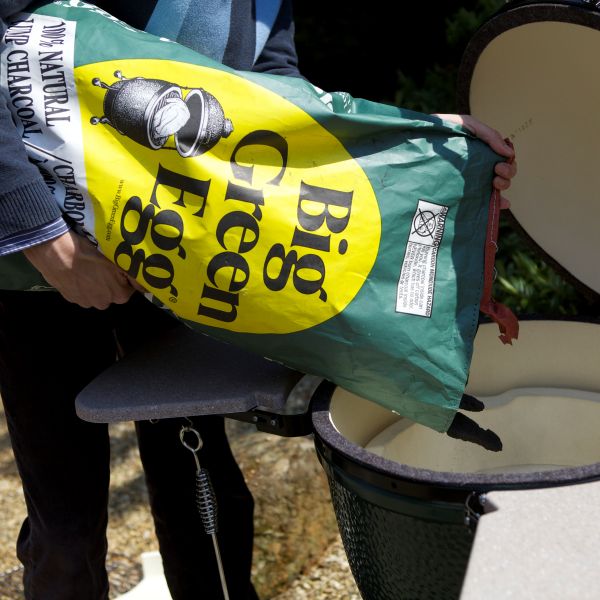
 You don't need to buy lighter fluid or charcoal briquettes which contain chemical additives and can affect the taste of your food. Big Green Egg Natural lump charcoal ensures that the food is cooked to tasty perfection, allows for easier cleaning and won't damage your egg. You can even cook your food straight onto the charcoal! Do NOT use lighter fluid or charcoal briquettes in your EGG.
- It's a much safer choice. The flames are contained within the EGG, meaning you can leave the egg to cook your food for hours on end. It also won't instantly burn you like a metal grill could - but the EGG will still be very hot to touch so do take care!
Here's another festive recipe that uses The Big Green Egg to really get those taste-buds going:
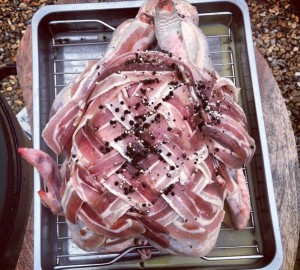
Bacon Lattice Butter Infused Turkey
This savoury turkey recipe uses the Flavour Injector to give additional moisture to the turkey in the form of a buttery/herbed stock. Any extra buttery juices that escape during cooking will collect in the Drip Pan with the roasted vegetables to create a delicious base for gravy.
Ingredients 16-20lb free-range turkey (bought to room temperature) 10-15 strips of streaky bacon. (Smoked or un-smoked according to preference) Optional selection of vegetables to roast inside and underneath the turkey; peeled potatoes, parsnips, red onions, carrots, garlic Injection Ingredients 300ml chicken stock or broth 250g unsalted butter (melted) 1 tablespoon lemon juice ½ teaspoon garlic powder Salt & Pepper Instructions- Bring the turkey to room temperature.
- Add the butter, chicken stock, lemon juice & garlic powder to a small pan and warm until melted and combined./li>
- Suck the mixture into the Flavour Injector and inject the turkey about a depth of approx. 1 inch into the turkey meat. Inject as you remove. (Some liquid will escape as you withdraw the syringe but the majority will stay in during the cook). Inject the meat approx. 18 -20 times across the whole turkey, including the legs. You’ll see the turkey meat swell instantly.
- Add a few of the vegetables inside the turkey cavity. We used red onions, garlic, & carrots. These will roast and give additional flavour to the turkey during cooking. Tie legs together with string if necessary.
- Place the turkey into the V Rack. Place the V Rack into the drip pan.
- To create a bacon lattice, lay the bacon in vertical strips on the breast of the turkey, followed by horizontal strips using the "under over under" plaiting method. Alternatively just lay strips of bacon on top! Finish with a sprinkle of salt and pepper.
- Add the Drip Pan and V Rack straight onto the Plate Setter. No need for the stainless steel grid. Close the lid. Note: the temperature will appear to drop for about 15-20 minutes because you have added a large amount of meat, as well as the Plate Setter which will be blocking and absorbing the direct heat. No need to constantly fiddle with the vents. Let everything settle.
- Cook for approximately 3.5 -4 hours or until the internal temperature between the thigh and cavity registers 165F or 74C on a digital thermometer.
- Approx. 1 hour 15 mins before the end of cooking time, place the remaining potatoes and parsnips in to the rectangular drip pan with a drizzle of rapeseed oil, salt & pepper.
- Pour any butter or turkey juices inside the cavity into the drip pan with other juices to create gravy with.
- Tent turkey in tin foil and cover with a towel for insulation. Rest for half an hour before serving.