A Guide to Planting Winter Harvest Potatoes
Potatoes are a well loved and versatile crop, popular in many dishes around the world. This root vegetable originates from the Americas, and many varieties can be grown all year-round.
Seed potatoes are a great vegetable to grow for new gardeners as, with a few simple tips and tricks, you could have yourself an abundance of potatoes ready for warming winter meals. These vegetables take roughly 3 months to be ready to harvest but require minimal effort, making them a great starter plant to improve your gardening skills.

What are seed potatoes?
Seed potatoes are a type of potato, similar to what is sold in supermarkets. They are used to grow and produce potatoes. To be considered a seed potato, vegetables are specially treated to make them virus free and suitable to grow from.
This type of vegetable seed is known as a ‘tuber’, meaning that it begins life underground, with the foliage growing above the surface and the vegetable under the soil. As the seed potato grows, multiple shoots form from the seed. As a result of this, multiple potatoes grown from a single potato seed.
The best varieties of winter potatoes

How to plant potato tubers
There are many ways to plant potatoes, including in grow bags, tubs, troughs, raised beds or even directly into the ground!. Read on for our tips and tricks on planting successful potato tubers!
Potato grow bags or planting containers
1. Ensure the grow bag or planter has sufficient drainage holes. You can add extra drainage by drilling holes into the bottom of the container, or cutting holes into the bottom of the grow bag.
2. Part fill the grow bag or container 5 to 6 inches deep with good quality vegetable compost.
3. Place 3 to 4 tubers with the ‘eye’ (new forming shoots) facing upwards, spaced roughly 3 to 4 inches apart. Cover with another 5 inches of soil.
4. Place another 3 or 4 tubers on the second layer of soil, spaced evenly apart, and evenly cover in a thick layer of soil.
5. Water thoroughly until water drains from the bottom of the bag.
6. As shoots and foliage grow above the soil, cover them in additional compost to protect them. Continue with this method as the foliage grows, leaving shoots 10 to 15 centimetres above the surface.
Planting potatoes in raised beds or the ground
1. Ensure the soil is loose and aerated using a long handled hoe to turn it.
2. Using the same hoe or a trowel, create rows spaced 2 feet apart and 6 inches deep.
3. Place each potato seed 5 inches from the next, with the eye (new form shoots) facing upwards.
4. Cover evenly in soil and water well.
5. As shoots and foliage begin to grow above the surface of the soil, cover with good quality vegetable compost to cover greenery.
6. To ensure the best produce, continue to cover new shoots and foliage with soil as the plant grows. Continue this throughout the season, leaving roughly 10 to 15 cm of foliage above the soil.

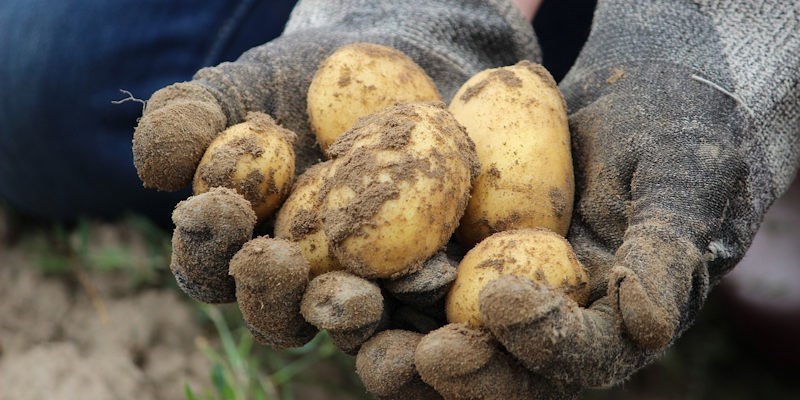
Getting the most from your potato harvest
Potatoes are ready to harvest when the foliage begins to turn yellow. To harvest crops without damage, take a long-handled digging fork and place to the side of the mounded soil. Drive the fork into the soil at an angle, and push the handle towards the ground to lift and loosen it.
Once the soil is loose, gently pull the foliage upwards to unearth the potatoes. To ensure all potatoes are harvested, take a hand-held garden trowel to move the soil, unearthing any left-over crops.
Storing harvested potatoes
Potatoes are best stored in a cool, dark, dry place, to ensure they stay fresher for longer. To improve ventilation and avoid rot, they can be kept in vegetable storage bags made from hessian, mesh or paper bags.

Problems with potatoes and how to solve them
Blight – This common disease is a fungus that kills the potato crop by rapidly spreading from plant to plant. It can occur during very warm, wet weather, when excess moisture is produced. Blight is noticeable due to rotting foliage. To avoid blight, plant crops in a well-drained and ventilated area. Treat early signs of blight with a fungicide.
Blackleg – This disease is caused by a bacterium and is noticeable by poor foliage growth, dying leaves and poor crop yield. It could also cause the whole plant to die without producing any crops. Reduce the risk of potato blackleg by limiting use of fertiliser and removing any infected plants as soon as possible.
Scab – This disease can be caused by bacteria in the soil and is often not noticed until the crop is harvested. It causes damage to the potato by causing small scabs to grow on the surface of the crop. Potatoes with scabs are still edible when the infected area is cut off. The disease is difficult to prevent, but can be avoided by growing scab-resistant varieties.